Tuesday, February 22, 2011

Chocolate Challenge

So how do you homeschool?  Do you like a nice, structured curriculum with lesson plans already laid out for you, or are you a free spirit who likes to wing it?  I must admit I tend to be the former.  I like structure, schedules, calendars, and lists.  I love lists.  I am a huge list person.  Just give me a list of what my kids need to be ready for the standardized tests each year, and we can work through it and I know I have no gaps and my kids have what they need!  The only problem is, it's a little boring.  Lately I have been hugely turned on to UNIT STUDIES and LAPBOOKS and all kinds of fun things like that!!!

Not that I think I could use unit studies exclusively.  Some people do and love it.  Some people are very creative and thoughtful and are able to work all their math and science and vocabulary and spelling words into interesting unit studies so that their kids hardly realize they are having school, they are having so much fun learning.  Not me.  I like LISTS of vocab and spelling words.  Math workbooks that go in a nice, organized order.  I like workbooks.  Have I mentioned I don't want any gaps?  I'm deathly afraid of gaps.

Well, amazingly enough, there seems to be a balance somewhere in between.  Oh, I still have my nice, organized workbooks.  Can't get enough of those.  But I can have the kids do all the even questions and skip the odds and get some of them done in half the time.  (Of course, if they miss too many, they have to go back and do them all.  This also helps ensure they study and make sure they get them right the first time!)  I can skip a few quizzes if I know the kids have mastered the material.  Or if we come upon a section that seems to be mostly review, we can just take the quiz and then move on.  My rule of thumb is generally that the kids have to score at least an 80% before we move on.  If they haven't mastered 80% of the material, we probably need to spend some more time on it.  Skipping some of the busy-work, however, opens up hours that we can spend on those glorious unit studies and lapbooks.  Incentive helps, too.  If I promise the kids a fun day or a field trip when they finish a certain amount of work, they finish it in a record-short amount of time!  With a good grade!

I've probably mentioned that my boys are hands-on learners.  And my girls like crafts and cooking.  And I'm a book-learner and a list-maker, so I have to adjust a little.  All this brings us to what we have to show for our school-time today.


Not much, it seems.  We started with 8 kids (a few homeschool friends joined us) and 5 trays of homemade chocolates.  This is all I could manage to get into a picture.  It didn't last long.  I believe the memories will, though.  We began Download 'N' Go's Chocolate Challenge unit study.


History, vocabulary, a little math, biography, geography - it's all in there, neatly organized with almost no prep time on my part.  Internet links, videos, recommended books, even coloring pages for the little guys.  Doing it with friends just added to the enjoyment.  We started our chocolate lapbooks.  As a little extra, I printed off the "Chocolate Challenge" title and each child's name in LetteringDelights.com's "Assorted Chocolates" alphabet, and they used these as the titles on their lapbooks.


And at the end of Day 1, we made our own chocolates.  If you've adored the little molded candies at showers and parties but thought they would be too difficult to make, let me assure you they are one of the easiest things to do with your kids.  You can purchase the candy molds and the small candy melts in chocolate, vanilla, or a variety of colors at a craft store like Michaels.  (Or you could just melt a Hershey bar.)  You simply melt the candy and pour it in the molds.  A few hours in the fridge and it's ready.  Um, but if you decide to do this project with 8 kids ages 3-11, be prepared for a fair-sized mess to clean up!

Happy Homeschooling!  


Monday, February 21, 2011

"Arizona Desert" by Sprouting Seeds Studio

Well, I'm running a little late, but here is my layout for Sprouting Seeds Studio's "Arizona Desert."  With its rich colors and southwestern theme, it was perfect for scrapping my pictures of the Grand Canyon and Monument Valley from our trip last year!


And of course I made my LO into a QP for you!  Click on image to download.  P/U only.  PNG file and SBT template for Macintosh iRemember included.


Click on the image below to go to Sprouting Seeds Studio and download the free kit!


Happy Scrapping!

Friday, February 18, 2011

Oh My Stars

Today we made stars in sewing class, to learn how to trim the seam allowances and push out the corners when you turn them right side out in preparation for making pillow cases and then clothes.


We are using My First Sewing Book and My First Machine Sewing Book by Palmer Pletsch.  It is a fantastic system for teaching sewing, using simple patterns and a series of rhymes to teach the basics.  The kids in the class are ages 7-11.  We started by making stitches with yarn on plastic canvas, then made little felt bookmarks with buttons on them.  After that, we moved on to the little felt stuffed animals, which are handsewn with a whipstitch all the way around.  My house is becoming filled with these little animals!  There are patterns for a ton of them in the Palmer Pletsch kits.  We have gone through about 3 huge bags of stuffing from Wal-mart!  After the children had fully mastered the art of hand-sewing felt animals, we started working with the machine.  First, the kids made all kinds of stitches on paper for practice.  Today we got to move on to making the stuffed shapes with a machine.  We are using the same patterns as before, but we learned how to make a seam allowance, sew the shape inside out, trim the seam allowances, then turn it right side out and stuff and finish it.  The star was good practice because it has five points that need to be pushed out and stuffed.  I am now preparing to expand the zoo for all the animals my children must now make on the machine with scrap fabric.  Good thing I got a bunch of fabric on sale for 50 cents/yard!

If you have seen my previous sewing posts, you can see that the sewing teacher has also given some of the older kids some private lessons so that they have already moved beyond this and made a Jedi robe and a doll dress.  The stuffed star and animal projects still teach them some important basics, though, and are fun projects that they enjoy making.

Happy sewing!

Thursday, February 17, 2011

No-Sew Tinkerbell Blanket

My daughter wanted to make another one of these gorgeous Disney knotted blankets.  The kits are sold at Wal-mart.  She's actually old enough that she did it mostly by herself.  I know I should be more creative and quit buying all these kits, but the projects are so nifty!


It is simple to do one of these without a kit.  Get two pieces of fleece that you like (the back of this one is solid lime-green), and pin them together to hold them in place.  Cut a square that's 3 inches on each side out of each corner.  Cut 3-inch fringes through both pieces all the way around, and tie knots with the fringes on the top piece and the fringes on the bottom piece.  Remove the pins.  You can also make a knotted blanket with one piece of fleece, but this double ply makes a nice heavy, cozy blanket!

Wednesday, February 16, 2011

Build-A-Bear-At-Home!

Well, I seem to have a knack for doing projects that have been discontinued - it must be because I'm always looking for sales or extreme clearance items!  I cannot find these Build-A-Bear kits in stock anywhere, so I'm not sure whether or not they are selling them anymore, but we got them half-price at Hancock Fabrics.  They were also sold at Wal-Mart, craft stores, and party supply stores.  Maybe they will be back in stock for Christmas or another holiday.

My kids loved stuffing and sewing the 7-inch, 3-oz bears by themselves at home.  They each came with a heart to put inside, a birth certificate, and an outfit.  It was just like getting a new Build-A-Bear at the store, only smaller.  All 3 of these came with girl outfits, so my son opted to use only the sunglasses and give the rest of his bear's outfit to his sisters.  This was a safe project and good sewing practice for the younger ones, as the holes were already cut in the material, and they sewed them together with the plastic safety needle that was included.


Welcome to the family, little friends!

Monday, February 14, 2011

Happy Valentine's Day!

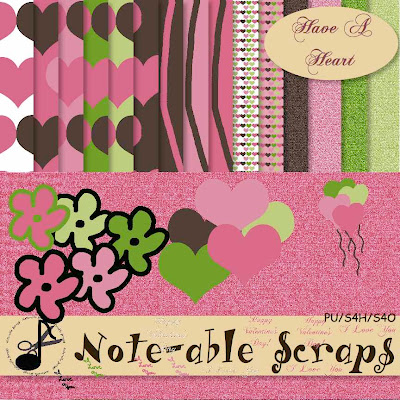
I hope you are having a wonderful Valentine's Day!  We are getting ready to go to a homeschool group Valentine's Day party.  Here's a little kit to scrap those fun Valentines!  PU/S4H/S4O.  Click image to download.

Happy New Year! (Freebie)

May the year ahead be full of hope, kindness, and goodwill toward men.  Grant us, Lord, that we may follow You more and more.

Happy New Year!

Click image to download kit.  PU/S4H/S4O.

Thursday, February 10, 2011

Fun Math Games - Without Batteries???

Yesterday I pulled out a tool we've had for a long time but haven't used in quite a while for my second-grader:  Math Wraps by Klutz.  These little booklets are lots of fun and provide a little extra math practice.  My girls took it, turned it over and over in their hands, and said, "Where do you put the batteries??"  Yes, we are raising full participants in the electronic generation!  Nevertheless, my second-grader played with this for hours and loved it.


This one is Grade 2 "Creature Math."  Each page has at least one problem with a cute little creature in it.  This is a matching game where you wrap the string from each problem on one side of the page to the answer on the other.


Once you are done, you turn the booklet over, and if you got them all correct, the string pattern will match the pattern on the back.


It is great for a quiet riding-in-the-car or waiting-in-the-doctor's-office activity.  There are other books and other grade levels available.  Apparently these are out of print now, which makes me very sad, but you can still find them on sites like Amazon.

Also, if you are looking for fun Math games, check out Big Brainz.com.  There is a free download for Timez Attack, a video game teaching multiplication tables.  I have found it to be an oasis in the desert of math-teaching-tools-that-don't-appeal-to-boys!


Have a happy math class!


You Rock, Valentine!

Ah, yes, the great holiday of love is just around the corner, and we must bake heart-shaped cookies and make heart-shaped crafts, right?!  These are my girls' favorite Valentines to make.  I believe this is the third year in a row they've made them for their friends, and I hope their friends aren't getting tired of them, because my girls aren't!  These little ipods are made with boxes of "conversation hearts" candy.  This year we used Hershey kisses for the ear buds instead of Reese's cups, largely because when Reese's cups are in the house, Mommy eats them before they can be used for any craft, but we had loads of kisses left over from Christmas!


You can download the instructions and the paper templates for the front of the iPod from Disney's Family Fun Magazine.

Paper templates only - download here.

Happy Valentine's Day!

Sunday, February 6, 2011

Marvelous Light

Last Sunday, I was very impressed by Grant standing in the front row at church.  Standing in the front row during the music and worship may not be all that impressive to some, but I was impressed because Grant had been in a wheelchair for almost a year, almost as long as I have known him.  I noticed last Sunday that when the congregation stood up during a certain song, he pulled himself up on a walker and stood.  He could have remained seated, and no one would have thought twice about it.  People understand why he is sitting, and it was not necessary for him to make the effort.  But he did make the effort.  Worshipping God was very important to him, and he was not willing to offer less than all he could give.  I thought this was a tremendous example for him to set, for young people in our audience to see him up in the front row, getting up out of his wheelchair to stand and sing to the Lord.  I decided I should tell him how inspiring he was to me.

I did not get the chance.  Grant left us this week.  He will be watching his beloved Steelers play tonight from his eternal home, if he still has any interest in the Super Bowl after seeing the streets of gold and his Savior's face.

Yesterday at the funeral, after singing "Amazing Grace," the worship leader began "Marvelous Light."  If you do not know that song, it is more upbeat, one where the teenagers usually yell "Woooo!" in between the lines, not your typical solemn funeral march.  But it was what Grant had requested.  As I listened to the words, as though I were hearing them again for the first time, I realized why.  "Into marvelous light I'm running/Out of darkness, out of shame."  Grant got up out of the wheelchair this week and ran into the marvelous light of his Savior's arms.  He's running and jumping and dancing and probably yelling "Woooo!"  

"My dead heart now is beating,
My deepest stains now clean.
Your breath fills up my lungs.
Now I'm free. Now I'm free!. . . .

Sin has lost its power
Death has lost its sting. . . .

Into marvelous light I'm running,
Out of darkness, out of shame.
By the cross you are the truth,
You are the life, you are the way"
Marvelous Light by Charlie Hall

By the way, Steelers, win one for us tonight!


Thursday, February 3, 2011

Shoebox Guitars

We love music in our family.  We sing, and we have a piano, two keyboards, a trombone, a flute, about 3 acoustic guitars, an electric guitar, and a Paper Jamz guitar.  Notice, I didn't say we play all those instruments, I just said we have them.  It's hard to resist a second-hand instrument at a good price.  After all, when you have several kids, someone might learn to play it someday, right?

The only thing more fun than learning to play second-hand instruments is making your own!  Shoebox guitars are a favorite of my little rockers.  We originally got this project from a Girl Scout (Brownie) Try-Its book, but I've seen them in a number of other places.


1) Start with an old shoebox or other rectangular cardboard box.
2) Cut a rectangular or oval hole in the front for your strings.
3) Use an empty paper towel roll for the neck.  Cut a circular hole at one end of your shoebox just big enough to insert the paper towel roll, and insert it.
4) Cut 6 rubber bands to use for strings.  Pull them across the opening on the front of your guitar and staple each end.  They should be taut but not stretched too far, or they will break or pull out of the staples.
5) Cover your guitar (except for the opening with the strings) and the neck with colored duct tape and decorate to your satisfaction.
6) Invite your friends over for a jam session!

You can also use pots and pans or oatmeal canisters for drums, and make a tambourine by stapling two paper plates together with dried beans or uncooked rice inside, and you have a rock band!

Wednesday, February 2, 2011

"Valentine's Day 2011" by Sprouting Seeds Studio Quickpage Freebie!

Happy February, everyone!  Well, since much of the country is blanketed in bad weather, it's a great time to stay inside and scrap, don't you think?  Sprouting Seeds Studio has a great freebie today in non-traditional Valentine's colors, called "Valentine's Day 2011."  Click on the preview to go pick it up from their blog, then scroll on down for the Quickpage in both iRemember Template and PNG formats.  P/U only.  Happy Scrapping!


Here's my L/O:


Click Preview for Freebie: